Well, aside from getting sued by our former landlord, we’ve been busy with garden plans this summer. I repeatedly bent the ear of my friend @mdeeter on constructing a raised garden bed to the point where I felt ambitious (not to mention confident) enough to build my own based on some of his recommendations, advice and experience.
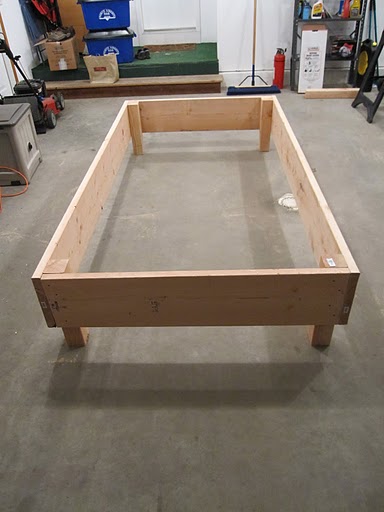
For lumber I used three 8′ lengths of 12″ x 2″ Douglas Fir (wanted to go with Cedar, but they had none at our local Lowe’s…and Douglas Fir is supposed to be a bit more rot resistant than Pine). One of the lengths I cut evenly in two…leaving me perfect lengths for a single 8′ x 4′ raised bed. At the corners I used 16″ lengths of cedar 4″x4″ posts. Assembled in the garage, the whole contraption looked like this:

Once assembled, the real work began: installing it and filling it with soil.
So it turns out that you can’t just throw a raised bed out in your yard. No, you have to make sure the sides are 2″ below ground. This meant I had to dig out the four post holes, then rip up straight lines of turf for each side, and level the whole thing. After a while I sacrificed precision on the altar of expediency. Let’s just say that the raised bed is “mostly” 2″ in the ground, depending on where you measure.
Once it’s in the ground, there’s tons more fun to be had! For me, this took the form of a trip to Lowe’s where we picked up 20 bags of top soil (40lb apiece), 4 bags of compost and 4 bags manure. Yeah, we splurged and spent the extra few cents for organic. We also completely bottomed out our XTerra with all that dirt. By my estimate, topsoil is most likely composed of equal parts lead, uranium and tungsten.
It’s kind of strange to think that we live atop some of the most fertile soil on the planet, yet we still feel the need to go to Lowe’s for dirt for our garden. Oh well.
Once we got home, Rebeka came down with an acute case of, “It’s too hard” to provide much help moving the heavy bags from the car to the garden. Fortunately, she was more than capable of providing executive management, direction and ice cold beer that was imbibed in quantities sufficient enough to keep the agonizing ball of fire growing in my lower back at bay for awhile.
Once I managed to get the whole raised bed filled with soil, I left everything alone for a couple days and before throwing in the plants.
Actually, I didn’t quite throw them in… though doing so would have been easier on my back. But, since I drove to Des Moines to pick up my plants, I figured they deserved more than a simple lob into the garden as I walked past.
Yeah, that’s right. Des Moines. I drove 120 miles for tomato plants.
Not just any plants, mind you. These are heirloom tomato plants. Heirloom is a word meaning, “plants that you’ll drive half way across the state for.” Actually, to be fair, the trip was a great excuse to go see my friend Ryan, who started O’M’s Heirlooms.
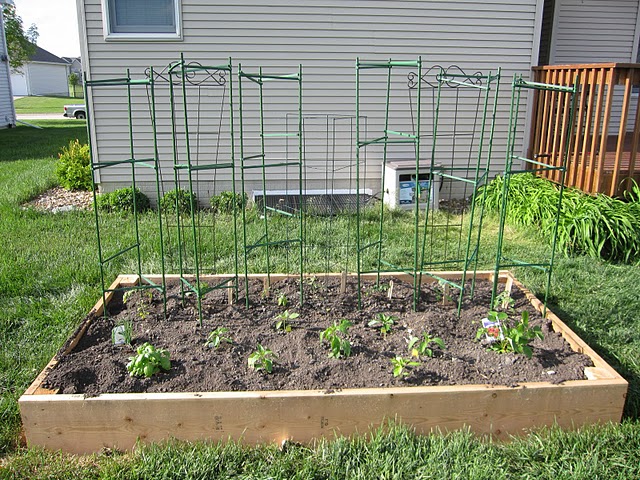
In addition to the tomatoes, we planted basil, a bunch of varieties of peppers, cucumbers, chives, and some strawberries. You can see how everything came out here:

Yeah, I know everything is packed in rather tightly. I have no idea how it will turn out, but that’s part of the fun of it all.
Stay posted for garden updates throughout the summer…
PS: Here’s the list of tomato varieties we planted. Full descriptions available from O’M’s Hierlooms:
- Great White
- Jaune Flamme
- Goldman’s Italian American
- Radiator Charlie’s Mortgage Lifter
- African Queen
- Gold Medal
- Black Krim
